|
Patent
|
|
All |
| Place An ORDER |
|
|
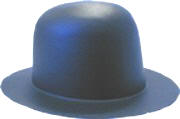
HAT SHAPERS
The wooden hat
block
is a thing of the past!
|
Patent
|
|
All |
| Place An ORDER |
|
|
|

HAT SHAPERS
The wooden hat
block
is a thing of the past!
|
Patent
|
|
All |
| Place An ORDER |
Click on
the underlined links below to navigate our website
Product Quickview
ORDERING
LINKS
CLASSIFIEDS
PATTERNS Knit to Felt
9/11 Tribute
Felting Info.
Hat Dictionary Felting
Dictionary
Felting Booklist
Felting Instructions
Hat Booklist
Our Story
Hat Facts
Old Hat Adds
Old Postcards
Hat Quotes
Famous Hats
Happy Customers
Your Creations
GUEST BOOK
Fulacht Fiadh
Waulking
Hat Care So Twisted
Top
HOME
|
Patent
|
|
All |
| Place An ORDER |

Click on
the underlined links below to navigate our website
Product Quickview
ORDERING
LINKS
CLASSIFIEDS
PATTERNS Knit to Felt
9/11 Tribute
Felting Info.
Hat Dictionary Felting
Dictionary
Felting Booklist
Felting Instructions
Hat Booklist
Our Story
Hat Facts
Old Hat Adds
Old Postcards
Hat Quotes
Famous Hats
Happy Customers
Your Creations
GUEST BOOK
Fulacht Fiadh
Waulking
Hat Care So Twisted
Top
HOME
HAT SHAPERS
The wooden hat
block
is a thing of the past!
|
Patent
|
|
All |
| Place An ORDER |
Click on
the underlined links below to navigate our website
Product Quickview
ORDERING
LINKS
CLASSIFIEDS
PATTERNS Knit to Felt
9/11 Tribute
Felting Info.
Hat Dictionary Felting
Dictionary
Felting Booklist
Felting Instructions
Hat Booklist
Our Story
Hat Facts
Old Hat Adds
Old Postcards
Hat Quotes
Famous Hats
Happy Customers
Your Creations
GUEST BOOK
Fulacht Fiadh
Waulking
Hat Care So Twisted
Top
HOME
Click on
the underlined links below to navigate our website
Product Quickview
ORDERING
LINKS
CLASSIFIEDS
PATTERNS Knit to Felt
9/11 Tribute
Felting Info.
Hat Dictionary Felting
Dictionary
Felting Booklist
Felting Instructions
Hat Booklist
Our Story
Hat Facts
Old Hat Adds
Old Postcards
Hat Quotes
Famous Hats
Happy Customers
Your Creations
GUEST BOOK
Fulacht Fiadh
Waulking
Hat Care So Twisted
Top
HOME
|
Patent
|
|
All |
| Place An ORDER |
Click on
the underlined links below to navigate our website
Product Quickview
ORDERING
LINKS
CLASSIFIEDS
PATTERNS Knit to Felt
9/11 Tribute
Felting Info.
Hat Dictionary Felting
Dictionary
Felting Booklist
Felting Instructions
Hat Booklist
Our Story
Hat Facts
Old Hat Adds
Old Postcards
Hat Quotes
Famous Hats
Happy Customers
Your Creations
GUEST BOOK
Fulacht Fiadh
Waulking
Hat Care So Twisted
Top
HOME
Click on
the underlined links below to navigate our website
Product Quickview
ORDERING
LINKS
CLASSIFIEDS
PATTERNS Knit to Felt
9/11 Tribute
Felting Info.
Hat Dictionary Felting
Dictionary
Felting Booklist
Felting Instructions
Hat Booklist
Our Story
Hat Facts
Old Hat Adds
Old Postcards
Hat Quotes
Famous Hats
Happy Customers
Your Creations
GUEST BOOK
Fulacht Fiadh
Waulking
Hat Care So Twisted
Top
HOME
HAT SHAPERS
The wooden hat
block
is a thing of the past!
|
Patent
|
|
All |
| Place An ORDER |
Click on
the underlined links below to navigate our website
Product Quickview
ORDERING
LINKS
CLASSIFIEDS
PATTERNS Knit to Felt
9/11 Tribute
Felting Info.
Hat Dictionary Felting
Dictionary
Felting Booklist
Felting Instructions
Hat Booklist
Our Story
Hat Facts
Old Hat Adds
Old Postcards
Hat Quotes
Famous Hats
Happy Customers
Your Creations
GUEST BOOK
Fulacht Fiadh
Waulking
Hat Care So Twisted
Top
HOME
Click on
the underlined links below to navigate our website
Product Quickview
ORDERING
LINKS
CLASSIFIEDS
PATTERNS Knit to Felt
9/11 Tribute
Felting Info.
Hat Dictionary Felting
Dictionary
Felting Booklist
Felting Instructions
Hat Booklist
Our Story
Hat Facts
Old Hat Adds
Old Postcards
Hat Quotes
Famous Hats
Happy Customers
Your Creations
GUEST BOOK
Fulacht Fiadh
Waulking
Hat Care So Twisted
Top
HOME
|
Patent
|
|
All |
| Place An ORDER |

Click on
the underlined links below to navigate our website
Product Quickview
ORDERING
LINKS
CLASSIFIEDS
PATTERNS Knit to Felt
9/11 Tribute
Felting Info.
Hat Dictionary Felting
Dictionary
Felting Booklist
Felting Instructions
Hat Booklist
Our Story
Hat Facts
Old Hat Adds
Old Postcards
Hat Quotes
Famous Hats
Happy Customers
Your Creations
GUEST BOOK
Fulacht Fiadh
Waulking
Hat Care So Twisted
Top
HOME
HAT SHAPERS
The wooden hat
block
is a thing of the past!
|
Patent
|
|
All |
| Place An ORDER |
Click on
the underlined links below to navigate our website
Product Quickview
ORDERING
LINKS
CLASSIFIEDS
PATTERNS Knit to Felt
9/11 Tribute
Felting Info.
Hat Dictionary Felting
Dictionary
Felting Booklist
Felting Instructions
Hat Booklist
Our Story
Hat Facts
Old Hat Adds
Old Postcards
Hat Quotes
Famous Hats
Happy Customers
Your Creations
GUEST BOOK
Fulacht Fiadh
Waulking
Hat Care So Twisted
Top
HOME
Click on
the underlined links below to navigate our website
Product Quickview
ORDERING
LINKS
CLASSIFIEDS
PATTERNS Knit to Felt
9/11 Tribute
Felting Info.
Hat Dictionary Felting
Dictionary
Felting Booklist
Felting Instructions
Hat Booklist
Our Story
Hat Facts
Old Hat Adds
Old Postcards
Hat Quotes
Famous Hats
Happy Customers
Your Creations
GUEST BOOK
Fulacht Fiadh
Waulking
Hat Care So Twisted
Top
HOME
|
|